Posts Tagged 'ASP.NET Web Forms'

Creating and Publishing NuGet Packages

NuGet is one of those tools that gets more and more important all the time. A while back, it was useful for adding small, specialized packages for particular projects. Nowadays, it’s fundamental – and going to be even more so when vNext is live. We all use it to add packages, but how difficult is it to create and publish our own packages? As it turns out, not very difficult at all.

I’d been meaning to turn my data annotation validator into a NuGet package for some time – and today, I finally did something about it. This is how you do it:

1. Get nuget.exe

Go to nuget.org or nuget.codeplex.com and download nuget.exe. Once you’ve got it, save it somewhere nice and easy because you’re going to need to….

2. Add it to the path

Right click on ‘computer’ in windows explorer, select ‘properties’ and then ‘advanced system settings’. Then click on ‘Environment Variables’ in the dialog.

In the Environment Variables dialog, find the Path variable and click Edit.

In the next dialog, add a semi-colon at the end and then put in the full path to nuget.exe (in my case that was c:\Nuget):


3. Create a Nuspec file.

This is a little XML config/specification file used in packaging, and you generate it from the command line. Open a command window, navigate to the folder where you have your Visual Studio project file and type in:

Nuget spec

This, of course, is why you wanted nuget in the path. Nuget.exe will now generate the XML file using your assembly settings, and placing default text where it doesn’t have info. Here’s a raw one:

And here’s one that’s been edited:

4. Pack it ready for publishing

This is again done using the command line, adding an argument to tell it to package the release version, not the default (which is probably debug). I’ve put brackets around the part that you would need to replace with your own package:

nuget pack [DataAnnotationValidator.csproj] -Prop Configuration=Release

The result is another file, this time with the extension nupkg.

5. Publish it to Nuget

That means first you have to go there and sign up – which is all very straight-forward. Once you’re signed up and you’ve clicked on the link in the confirmation email, you will have an API key on your profile page, and that allows you to publish your package. Get your key and then run the following in your command window:

nuget setApiKey [key from profile page]

That means you won’t have to put in your key every time. Now go to the Upload Package page and browse for your nupkg file:


It asks you to verify the details….


And then that’s it – your package is online and available for download.


I installed the package to test it, and the config file was updated….


the reference was added…..


and the dll was in the bin directory:


And that allowed me to add the control to the toolbox and use it as part of my project:


Obviously, there’s a lot more you can do with NuGet – like adding support for multiple frameworks – and I may well look at some of the options in a future post.

Kevin Rattan

For other related information, check out these courses from Learning Tree:

Building ASP.NET Web Applications: Hands-On

Building Web Applications with ASP.NET MVC

Using Web Forms in an MVC Site

I’m teaching an HTML5 course this week, but one of my students had an ASP.NET question: how do you combine Web Form pages with ASP.NET MVC? It’s an interesting question, and not one that’s covered in any of our courses. Our MVC class covers MVC, our Web Form course covers Web Forms… and never the twain shall meet. But actually, combining the two is very straightforward, and can be very useful. ASP.NET MVC is great… but it doesn’t do grids anywhere near as easily or as well as Web Forms. And what if you have legacy Web Form pages that you want to include in your shiny new MVC site so that you don’t have to recreate absolutely everything on day one?

Here’s how you do it.

First, let’s build an MVC site. I created a standard MVC 4 site:

Using the Internet Application template and Razor syntax:

That gives a basic structure and sample controllers/views:

Now I want to add a nice grid to display a list of restaurants. I could do this the hard way with MVC, but why bother when I could use the Web Forms GridView?

So first I create a quick Entity Framework .edmx file for the table I want to display:

Then I add a Web Form to my site. That’s easy. Just right-click on the project and use Add | New Item….

Then I drag on a GridView…

And configure it to use an Entity Data Source pointed at the Restaurants entities, with some auto format goodness to make it purdy…

Then I add a link inside the layout view that points at my .aspx page (so NOT an MVC style route):

And when I click on it – tara! – I have a working Web Form page with a Grid inside an MVC application:

There is, of course, a catch. You can get some issues mixing the two forms of routing together (MVC logical routes and Web Form end points). The solution here is to tell MVC to ignore incoming routes that contain .aspx. You do this inside the RouteConfig in the App_Start folder:

And now we have an application that uses both ASP.NET technologies.

Of course, in the real world you’d have to worry about making your Web Forms look and feel like your MVC site, and there’s the whole thorny issue of keeping them in sync and how you can have a well-organized site with two different approaches to the UI…. But on the other hand, it’s nice to be able to take advantage of Web Forms where they can do things easily, and it makes migration from Web Forms to MVC much easier.

Kevin Rattan

For other related information, check out these courses from Learning Tree:

Building ASP.NET Web Applications: Hands-On

Building Web Applications with ASP.NET MVC

Supporting Multiple Versions of jQuery

I was in New York recently teaching my ASP.NET Web Forms class while one of my colleagues was teaching my jQuery class a couple of doors away. One of the students in the jQuery class asked an interesting question, and since another instructor – Randy Casburn – was sitting in the back of the room, he had some fun playing around with alternative answers. I thought the code he came up with might be useful to someone, so I’m posting it here – along with two other answers to the question: ranging from the officially recommended (but restrictive) to the deeply unofficial (but clever and very flexible).

Why might you want to do have multiple versions? There are all sorts of reasons:

  • You may be using a plugin that relies on an older version
  • As a developer, you may not have control over the whole page – just your portion of it – and other developers/teams may be adding their versions of jQuery elsewhere on the page. (This is particularly true if you have a complex server side set up, and your pages are built from different elements maintained by different developers/teams).
  • You may use a third party tool that relies on a particular version
  • A component may inject an older version of jQuery whether you want it to or not.

So – first, what are the official answers to the question?

Answer one: don’t do it, use the migration plugin.

The idea here is that you don’t run an older version of jQuery as well as a newer version, you use the migrate plugin to add backwards compatibility to your newer version (1.9+). First replace your old version of jQuery with the new one, then add a reference to the migrate plugin. As if by magic, the deprecated elements removed in the more recent version are restored and your existing code works:

<script src=”http://code.jquery.com/jquery-1.10.2.js”></script&gt;

<script src=”http://code.jquery.com/jquery-migrate-1.2.1.js”></script&gt;

Advantages: you only have one version of jQuery, and the plugin provides a migration path until you get around to updating.

Disadvantages: it only goes back as far as jQuery 1.6.4, so if you need to support an older version, it doesn’t help.

Answer two: use .noConflict()

The noConflict() method is designed to relinquish jQuery’s use of the $ alias so that jQuery can work alongside other JavaScript libraries. It works just as well when that ‘other’ library is an older version of jQuery, even if the jQuery team does not recommend having more than one version.

The following code….

<script
src=’http://code.jquery.com/jquery-1.6.min.js’></script>

<script
src=’http://code.jquery.com/jquery-1.7.2.min.js’></script>

<script>

    jQuery.noConflict();

/**

    Newer version code would be here

    Note: use of ‘on()’ method

**/

    jQuery(function(){

        jQuery(‘#new’).on(‘click’, function(e){

            e.preventDefault();

            jQuery(‘body’).append(‘You clicked on the “jQuery” link. It used version: ‘+jQuery.fn.jquery+‘<br/><br/>’);

        });

    });

/**

    Legacy code would be here

    Note: use of ‘bind()’ method

**/

    $(function(){

        $(‘#old’).bind(‘click’, function(e){

            e.preventDefault();

            $(‘body’).append(‘You clicked on the “$” link. It used version: ‘+$.fn.jquery+‘<br/><br/>’);

        });

    });


</script>

</head>

<body>

<a
id=’old’
href=’#’>Execute older version (jQuery as $)</a>

<br/><br/>

<a
id=’new’
href=’#’>Execute newer version (jQuery as jQuery)</a>

<br/>

</body>

Leads to the following output when both buttons have been clicked:

That’s nice if you need to support two versions of jQuery, one of which is older than 1.6.4. But what if you have a situation where you absolutely have to use more than two versions of jQuery side by side? Here is Randy’s solution:

Answer three: Alias, alias, alias

The solution here is to add the version of jQuery you want to use and assign it to a variable. Then add another version, and assign it to another variable. Repeat as necessary.

Here’s the code:

    <script
src=’http://code.jquery.com/jquery-1.3.pack.js’></script>

    <script>

    var $$$ = jQuery;

    </script>

    <script
src=’http://code.jquery.com/jquery-2.0.3.min.js’></script>

    <script>

    var $$ = jQuery;

    </script>

    <script
src=’http://code.jquery.com/jquery-1.6.min.js’></script>

    <script
src=’http://code.jquery.com/jquery-1.7.2.min.js’></script>


<script>

    jQuery.noConflict();

    $$$(function(){

        $$$(‘body’).append(‘/————-/<br>$$$ is version: ‘+$$$.fn.jquery);

        $$$(‘body’).append(‘<p>’ + testOnSupport($$$) + ‘</p>’);

    });

    $$(function(){

        $$(‘body’).append(‘/————-/<br>$$ is version: ‘+$$.fn.jquery);

        $$(‘body’).append(‘<p>’ + testOnSupport($$) + ‘</p>’);

    });


    jQuery(function(){

        jQuery(‘body’).append(‘/————-/<br>jQuery is version: ‘+jQuery.fn.jquery);

        jQuery(‘body’).append(‘<p>’ + testOnSupport(jQuery) + ‘</p>’);

    });

    $(function(){

        $(‘body’).append(‘/————-/<br>$ is version: ‘+$.fn.jquery);

        $(‘body’).append(‘<p>’ + testOnSupport($) + ‘</p>’);

        $(‘body’).append(‘/————-/<br>’);

    });

    function testOnSupport(x)

    {

     if (typeof (x(‘body’).on) == ‘undefined’) nope = ‘Does not support on()’; else nope = ‘Does support on()’;

     return nope;

    }


</script>

</head>

<body>

<br>

</body>

And here’s what the output looks like:

Do I recommend having multiple versions of jQuery side by side? Emphatically not. But if you have no choice in the matter, there are a surprising number of ways to get there. Whichever you use, do be careful of the order in which you add your references – if you’re using .noConflict() for example, you need to make sure you put your script files and the .noConflict() code AFTER any older version of jQuery injected by a component.

Kevin Rattan

For other related information, check out this course from Learning Tree:

jQuery: A Comprehensive Hands-On Introduction

Creating a Custom DNN Module and Integrating Captcha

I recently had a customer request to add a Contact Us form to their DNN installation. It’s something I hadn’t done for a while. In fact, it’s been so long that the language has changed. Last time I played around behind the scenes on DNN (or DotNetNuke as it then was), the language was VB only – this time, the installation is C#. It turned out to be a lot simpler than it was back then, and also gloriously easy to add captcha – another of the customer requirements, as they’re tired of receiving spam from online forms.

I’m guessing that this is something a number of the readers of this blog might need to do some time, so I thought I’d share the easy way to build a DNN form module that includes a captcha.

Getting DNN to Create the Module

The first step is to get DNN to create the Module for you. You’re going to do this twice – once on your development machine, and again on the live site.

I ran the development copy of the site from Visual Studio 2012 and logged in as the host. Then I did the following:

  1. Go to Host | Extensions

  1. On the Extensions page, select “Create New Module”

  1. In the dialog, there will initially be a single dropdown for “Create Module From”. Select “New”

  2. This will then open up more fields, and allow you to get DNN to do the hard work for you. You want to
    1. Define an owner folder – in this case I went with my company name as the outer folder
    2. Create a folder for this specific module – I’m creating a contact us form, so ContactUs seemed like a sensible name
    3. Come up with a name for the file and the module – I went with Contact for both, to distinguish the Contact module from the ContactUs folder.
    4. Provide a description so you’ll recognize what it is
    5. Tick the ‘create a test page’ option so you can check everything was wired up correctly

You can now close your browser and take a look at the structure DNN has created. We have a new folder structure underneath DesktopModules  – an outer Time2yak folder, and a nested ContactUs folder, complete with a Contact.ascx file:

If you open the web user control in the designer, this is what you get:

That’s given us a good starting point – but the first thing we’re going to do is delete the Contact.ascx user control. Just make sure you copy the value of the inherits attribute from the DotNetNuke.Entities.Modules.PortalModuleBase directive at the top of the ascx page before you delete it:

Creating the Web User Control

Now we’re going to create our own user control with a separate code behind page.

  1. Delete Contact.ascx and then right click on the folder and create a new Web User Control called Contact. This will recreate the ascx file, but this time with a code-behind file

  1. Change the definition of the code behind file so that it Inherits from DotNetNuke.Entities.Modules.PortalModuleBase (which is why you copied it).
  2. Now all you need to do is code the user control to do whatever you want it to do, just like any other ASP.NET Web Forms user control. I added a simple contact form with textboxes, labels, validation etc.:

  1. I then used DNN’s built in Captcha control. It’s easy to use, provided you don’t mind working in source view, rather than design (actually, I prefer source view, so this works well for me). You just need to
    1. Register the Control

    2. Add it to the page

    3. Check the IsValid property in the code behind (note the use of Portal.Email to get the admin email address).

Import the Module to the live site

This is the easiest part of all. Just use the same steps to create the module on the live server that you did in development, and then copy your version of contact.ascx over the version on the live site.  You now have the module in place and it appears in the modules list and can be added to any page you want:

And when you add it to the page, you have a Contact Us form with a captcha, developed as a DNN module:

The only other step is to use DNN to create the ThankYou.aspx page that the form passes through to – and that’s just a matter of using the CMS and doesn’t involve any coding.

Kevin Rattan

For other related information, check out these courses from Learning Tree:

Building ASP.NET Web Applications: Hands-On

Dynamic Data and Web Forms – Part Three

This is the third in a series of posts looking at how to integrate Dynamic Data features into an ASP.NET Web Forms website – and hence take advantage of automated client-side data annotation validation. In the last post, I showed how to connect a label to a dynamically generated TextBox using some complicated data binding code:

It works, but it’s hardly practical. Fortunately, Dynamic Data allows you to create custom templates – and that offers a much more practical solution connecting labels to our UI controls.

Dynamic Data uses conventional names and locations, so the first thing we need to do is add a new folder structure to our Web site – a DynamicData folder, with a nested FieldTemplates folder.

Next, right click on the FieldTemplates folder, select Add New Item and pick Dynamic Data Field:

Name it appropriately – in this case, I went with LabelMapper, and the wizard generated two .ascx controls for me, LabelMapper.ascx and LabelMapper_Edit.ascx:

The first version is read only, and contains a literal control (don’t worry about the red underlining – it compiles and runs despite Visual Studio not being entirely happy):

And here is the edit version:

It’s simplicity itself to connect this to our dynamic controls via the UIHint attribute. Assign the name of the .ascx control as the value of the UIHint attribute, and Dynamic Data will automatically look inside the FieldTemplates folder under the Dynamic Data folder for the matching files.

Notice that I’ve also removed not only my label, but also the default scaffolded text explaining that this is the “from” field. That’s because we’re about to customize the template so that it autogenerates the label.

The first task is to drag a label into the template, and associate it with the TextBox:

Then we need to set the text. The obvious choice for this is the name of the property we’re binding to  (customizable as DisplayName via Data Annotations if the original property name  is unsuitable, e.g. combines two words into one). This information is available as Column.DisplayName inside the Dynamic Data Field:

Now when we run the page, we get labels properly associated with the controls:

But there’s still a problem. The Message field should be a TextArea, not a simple TextBox. We don’t want to have to create a whole separate template for that – and we don’t have to. Simply add a public TextBoxMode property to the template’s code behind, with a default value of SingleLine:

Then add a TextMode attribute to the TextBox and bind the value to the property:

And then set the value as an attribute of the Dynamic Control:

And now we have dynamically generated controls that respect data annotations and generate the controls we want via a couple of simple attribute settings:

And the best thing is – now that we’ve created the template, we can reuse it any time we use Dynamic Data controls with standard Data View controls, and get the benefits of dynamic control generation along with well formed, accessible HTML.

Kevin Rattan

For other related information, check out these courses from Learning Tree:

Building ASP.NET Web Applications: Hands-On

Dynamic Data and Web Forms – Part Two

In my last post, I showed how you can use Dynamic Data with the FormView and similar controls to autogenerate UI controls and associated validation based on data annotations. The one downside was that the scaffolded HTML is horrible – and fixing it is nowhere near as easy as you might hope.

This is some of the markup generated by the wizard in Visual Studio:

This is what the output looks like – notice the horrible ragged edge and the use of inaccessible LinkButtons:

And this is a snippet from generated HTML:

So – we have text where we should have a label, making our page both inaccessible and less functional than it should be, and we have a link button where should have a submit button. We can fix the button just by changing the type, and we can fix the ragged edge by adding in extra line breaks. But it turns out that the labels are much more of a problem than they might at first appear.

First, let’s try adding a label and pointing it at the dynamic control:

That looks like it ought to work… And at first sight, the generated Web page looks a lot better when we run it. The label is now on a separate line from the TextBox, and the styling shows that it is truly is a label control, and not just text:

Unfortunately, it’s not as good as it seems at first glance. A look at the HTML source shows that this label is not properly connected to its TextBox: the for and the id do not match.

The usual fix in these circumstances is to switch to static client side ids. So let’s try replacing our ASP.NET label with a simple HTML label, and setting the dynamic control to have a static ClientIDMode:

Here’s what we get when we run it:

Okay – so let’s try harder by setting the ClientIDMode of the FormView itself to Static and see if that will do the trick…

Unfortunately, that doesn’t help either – though, refreshingly, the problem is different:

Fundamentally, the problem is that the DynamicControl is a container. We need the label to be associated with the TextBox inside the DynamicControl.

First, let’s get rid of those Static ClientIDMode values, as we can’t have every TextBox with the id TextBox. Then let’s see if we can bind the value of the for attribute to the ClientID property of the control. We have to do a bit of digging to get there, as the TextBox is inside a FieldTemplate which is inside the DynamicControl, which is inside the FormView:

And this is the output HTML:

Finally, we have a winner. Except for the fact that Dynamic Data is supposed to simplify the generation of the UI, and there is nothing remotely simple about having to add labels with custom data binding code that includes nested FindControl() methods.

Fortunately, our quest for automated client side data annotation validation does not end there – because it’s possible to customize the templates for DynamicControls, and that offers a much more practical and satisfying solution to the problem of poor scaffolding. And that will be the subject of my next blog post.

Kevin Rattan

For other related information, check out these courses from Learning Tree:

Building ASP.NET Web Applications: Hands-On

Dynamic Data and Web Forms – Part One

I’ve blogged here a few times about data annotations and validation in ASP.NET, and most recently with some sample code for a Web Forms validator that converts data annotations into client-side validation. However, while there is no data -annotation-aware standard validator, there is one way you can get your controls to validate against data annotations – and that’s by using Dynamic Data.

Dynamic Data has been around for a while. It has its own project type, and can be used to scaffold an entire web site based on an entity model. It can be extensively customized but it’s not really suitable for public facing web sites (though it’s great for quick admin-only management).

But that’s not all there is to Dynamic Data. It is also available inside other projects. There are a set of controls in Web Forms that are specifically designed to integrate with Dynamic Data AND with existing Web Form controls such as the GridView and FormView. It’s these controls that give us out-of-the-box data annotation support.

So how does it work? Let’s consider a form to send an email. There are a number of ways to go about this. We could create a form from scratch using standard controls, adding our own validation:

Or we could create an email class complete with data annotations….

…and use it to get a FormView to scaffold  the form for us.  But despite all those nice data annotations, that doesn’t add validation, so again we would have to add it ourselves, so it’s not really saved us much work:

Alternatively, we could get a FormView to scaffold it for us using Dynamic Data – and this is where we start benefiting from those data annotations.

At first glance this doesn’t look any better, as there are no validation controls in sight – but only because they’re hidden away inside those dynamic controls – as are the TextBoxes that map to the object’s properties. There’s just one problem – this is what we get if we run the page…

It turns out that Dynamic Data is not enabled by default. You have to enable it on the container control, and tell it what type it’s dealing with – and you have to do so inside the Page_Init event.

So now when we run the page with the FormView set to insert mode, we automatically get TextBoxes for the Email…

And this time the data annotations give us client side validation (though I had to add the validation summary to show the message from the From property):

The only remaining problem is that the scaffolded HTML is horrible. There are no labels, just text – so the page is inaccessible. The clever link buttons rely on JavaScript, another accessibility no-no. The button is easily fixable, but adding Labels to the TextBoxes turns out to be surprisingly fiddly – and managing that (and how to customize dynamic controls generally) will be the subject of my next blog post.

Kevin Rattan

For other related information, check out these courses from Learning Tree:

Building ASP.NET Web Applications: Hands-On

ASP.NET Web Forms and jQuery Mobile Reconsidered

I’ve written before on this blog about the problems with combining Web Forms and jQuery Mobile. At bottom, it boils down to this: the Ajax navigation does not play well with ScriptManager. Beyond that, when working with jQuery Mobile you have multiple pages in the DOM at the same time, so you have to make sure you client-side IDs are unique across the site. And not only does every ASP.NET control already have a client ID, you also have to add IDs to the data-role page elements so that pageinit works properly.

I like the animated transitions – but not enough to make it worth that amount of effort. So I want to stop jQuery Mobile from converting my links and forms to use Ajax. Fortunately, that’s entirely doable.

jQuery Mobile exposes an ajaxEnabled property. If you set it to false inside the mobileinit event, your links will all behave as nature intended.

The one twist is that you need to do this between the script references for jQuery and jQuery Mobile. I placed the above code inside jquery.configuration.js, and then put them together thus:

When I click on the link to test2.html, the request does NOT use Ajax:

Test2.html does NOT have the configuration file:

And as a result, the request for test.html DOES use Ajax:

So – now we can use jQuery Mobile with ASP.NET Web Forms without worrying about all those pesky ID problems… And since that will eliminate most of the problems that arise from combining jQuery Mobile with the ScriptManager, wouldn’t it be nice if we could start using the ScriptManager with jQuery Mobile?

We could just add the configuration and jQuery Mobile scripts after the ScriptManager: but then other scripts might be injected in between, and that might lead to unexpected side effects down the line. So the best case scenario would be if we could inject our configuration file and jQuery Mobile into the ScriptManager itself. Fortunately, we can.

So how do we do that? Well, first we need to create a static class and a static method that calls ScriptManager.ScriptResourceMapping and adds a new definition:

Now the one final step is to tell ASP.NET about our new definitions. For this, we use the System.Web.PreApplicationStartMethod attribute, which runs at a very early stage in the application life cycle:

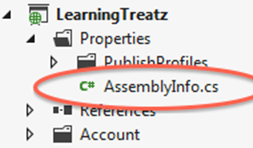
The best place to add this is inside AssemblyInfo under project properties

Now we can add both our configuration file and jQuery Mobile as ScriptReferences, using the names we specified when we added the definition:

And the end result is that the Web Forms application now uses jQuery Mobile AND ScriptManager seamlessly – with the minor sacrifice of forgoing the fancy animated transitions.

Kevin Rattan

For other related information, check out these courses from Learning Tree:

Building ASP.NET Web Applications: Hands-On

jQuery: A Comprehensive Hands-On Introduction

Combining Google Maps with ASP.NET Web Forms – Part 2

In my last post I showed how easy it was to add a Google map to a Web page. This time, I want to look at how you can customize the map by adding markers to it, as well as using data binding to build the script dynamically.

The application I’m using provides restaurant recommendations for Learning Tree education centers. What I want to do is add a map that shows the location of the restaurant – and for that, we need to have the latitude and longitude. That’s not something users will know, so the first thing we need is a form that asks Google for the information.

Here is the form:

The user fills in the address, then clicks on the Get Coords button– this calls a retrieveCoords() function which asks Google to look up the address and give us the longitude and latitude. The key object we need is Google.maps.Geocoder. It has a geocode() method that accepts a string address argument and returns an array of results containing location information – and specifically, lat() and lng() methods that have the details we need. Here is the code:

So now we have the longitude and latitude available, we want to add a map showing the restaurant location, so the the app goes from looking something like this:

To something like this:

This is similar to what we did last time, except that now we’re going to be building the script using longitude and latitude values from the database.

The basic page is as follows:

  1. The maps.googleapis.com/maps/api file is referenced in a content area mapped to the header on the master
  2. A div with the id map has been added immediately above a DetailsView which displays information about a restaurant. The div has been styled to float right (as in the image above).
  3. The DetailsView is bound to a list of Restaurant objects

Now what we have to do is build a script to

  1. retrieve a map centered on the longitude and latitude of the bound restaurant, and
  2. create a marker to indicate its location.

Since we have all the data ready to hand inside the DetailsView, that’s where we’re going to build the script. The first thing we need is TemplateField, and since there’s already one there, we’re just going to reuse that – we’re only adding script, after all, so it’s not going to affect the look and feel:

Then we use the same code that we did when we were building a simple Google Map – but this time using data binding to write the values into the JavaScript:

If you look carefully at the image, you’ll see that Visual Studio isn’t entirely happy. It thinks there’s a syntax error:

Fortunately, it’s wrong. The generated code is perfectly fine:

Which means we now have a Google map driven by a script that’s built dynamically using data binding. The resulting page looks like this:

However, we’re not done yet. We want to show the user the exact location of the restaurant, not just the general area. For that we need a marker – a google.maps.Marker, to be precise – which can be added to the map using the setMap() method. Like the Map object itself, the Marker needs a google.maps.LatLng object, so this time I’m going to create one explicitly and then use it in both methods. Here is the code:

And this is the final result, complete with marker (which will display the name of the restaurant if you hover over it, thanks to the title attribute:

There’s obviously a lot more you can do with Google maps – like customizing icons, adding directions and waypoint markers and much else besides – and I may just explore some of those features in future posts. For now, though, I think that should be enough to help those former (and future) students who want to make a start on combining Google maps and ASP.NET web forms.

Kevin Rattan

For other related information, check out these courses from Learning Tree:

Building ASP.NET Web Applications: Hands-On

Combining Google Maps with ASP.NET Web Forms – Part 1

One question that keeps cropping up while I’m teaching is – how do I include Google Maps in ASP.NET pages?

The short answer is – it’s incredibly easy: just go to this page, follow the steps and you’ll get code you can paste into your page. The problem with that is it only works for fixed locations. It’s great for showing a map of your office on your web page, not so great for displaying maps using data you’ve retrieved from a database. For that, you need to use JavaScript to call the Google Maps API.

In this post, I’m going to introduce the basics – how you sign up and the bare minimum JavaScript you need to get up and running. In my next post, I’ll look at building the script dynamically using data binding, and show you how to add a marker on the map.

The first thing you need to do is sign in to your Google account (you have one, right? If not, just sign up: it’s free). Then you need to go along to the API console at http://code.google.com/apis/console and get an API key. Without the key, there are limits to how much you can do with your maps and you can’t exceed the anonymous usage limit of 25000 requests per day. Passing the key to Google along with every request lets them track your usage so they don’t cut you off when the free limit is exceeded. (And if you’re going to be a heavy business user, then you need to go further, use the business API and get a client id).

Once you’re at the API console, you need a project to work with – so if you don’t have one already, it guides you through creating one. Then you need to sign up for individual services.

Just click on Services on the left….

And scroll down the page until you find maps. There are various options, but you want Google Maps API v3.

Now you need to get yourself a key. So click on API Access in the left hand menu:

Copy the key – you’re going to need it by and by. The other thing you’ll want to do is set up restrictions so that the key can only be used on domains you control (so that no-one can steal your key and use some of your quota). Click on the Edit allowed referers link on the right and then add your domains to the dialog – one line per domain, using the pattern *.mydomain.com/*. (Don’t worry about adding localhost; just leave the key out altogether when you’re testing).

Click on Update and you’re ready to begin.

First, add a script reference to maps.googleapis.com/maps/api/js to the page. It’s available via both http and https, so use a relative path beginning with // so it defaults to whichever protocol is currently being used by the page. The two arguments are key (which you can omit if you want to, and should omit during testing on localhost) and sensor, which is designed to tell Google whether the device sending the request has used GPS to find its location (so if you’re not doing so, just set it to false).

With the script available, you can now call the maps API. The first thing we need is a div on the page to hold the map. I’ve given mine the id ‘map’ (not very original, I know) and styled it in an external CSS file.

Now the infrastructure is in place, all we have to do is call the map and tell it what to display. We need to do two things:

  1. Create an options object literal specifying where we want the map to be centered, what zoom level to show (0 – 21: where 0 is the whole world) and which kind of map to display – a standard road map, satellite view or a hybrid.

  2. Create a new map, telling it 1) which div to use for display and 2) how to display it – which is done by passing in the options object we just created

And that gives us a map on the page, centered on the location we specified:

That’s it for now. In my next post, I’ll cover retrieving latitude and longitude information for a given address, displaying icons on the map and building the script dynamically on an ASP.NET page using data binding.

Kevin Rattan

For other related information, check out these courses from Learning Tree:

Building ASP.NET Web Applications: Hands-On


Learning Tree International

.NET & Visual Studio Courses

Learning Tree offers over 210 IT training and Management courses, including a full curriculum of .NET training courses.

Free White Papers

Questions on current IT or Management topics? Access our Complete Online Resource Library of over 65 White Papers, Articles and Podcasts

Enter your email address to subscribe to this blog and receive notifications of new posts by e-mail.

Join 29 other subscribers
Follow Learning Tree on Twitter

Archives

Do you need a customized .NET training solution delivered at your facility?

Last year Learning Tree held nearly 2,500 on-site training events worldwide. To find out more about hosting one at your location, click here for a free consultation.
Live, online training