Posts Tagged 'Visual Studio'

Visual Studio 2013 GitHub Source Control

I posted here a while back on using GitHub with Visual Studio 2010. It was a fairly involved process using a third party plugin. Well now you can integrate with GitHub directly from Visual Studio, and it’s much, much easier. I used it yesterday to make my DataAnnotationValidator (blogged about here) available on GitHub for anyone who wants to use it – and, hopefully, so I can collaborate with others on developing it.

Although GitHub integration is now easier, it’s still a trek through unfamiliar and somewhat confusing screens, so I thought it might be helpful to put together a beginner’s guide to working with GitHub and Visual Studio 2013.

First things first – if you’re not already a member, join GitHub. Then you’re ready to begin. I happen to need to put together a little Web Forms / DynamicData demo for a customer, so I’m going to use that project as my example (and then take it down again so I don’t clutter up my GitHub page) .

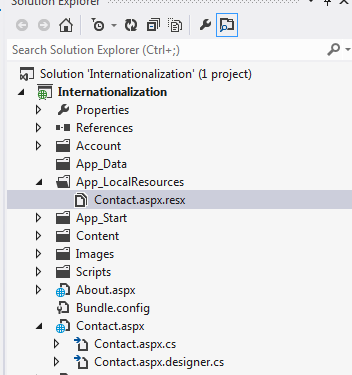
I created an ASP.NET Web Application and ticked the ‘Add to source control’ box.

Then I chose Web Forms and got rid of authentication as I don’t need it for the little demo I’m putting together.

The next screen asks you what kind of source control you want. Obviously enough, the answer for us is Git:

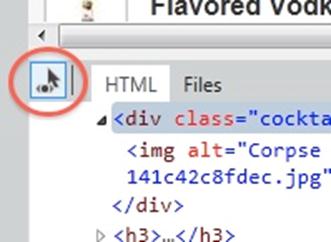
Now you want to click on the Team Explorer tab under Solution Explorer.

That takes you to the following view and encourages you to download the command line tools. I’ll leave that up to you and focus on the Visual Studio integration:

Now it’s time to setup what’s going to be stored on Git, and what isn’t. I see no point in storing the external packages, so I want to exclude them. Click on the Changes option and you see an interface which initially assumes everything is going to be stored on Git:

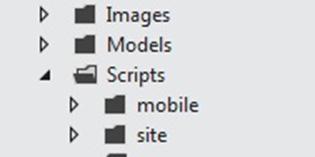
I selected the packages folder, right-clicked and chose exclude:


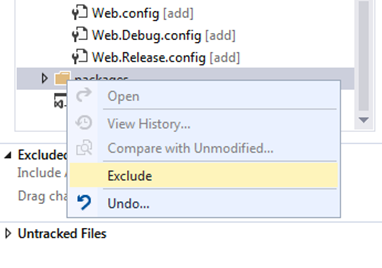
So now I have a list of included and excluded changes:

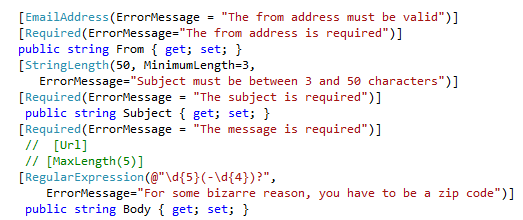
It’s time to enter a commit message and then click Commit… Except that you need to set up your email address and user name first:

Click on the Configure link and it takes you to a screen where you can enter your details. Notice, it also includes a couple of ignore rules for Git-related files:

So with that set up, we can fill in a commit message and commit our changes.

This commits them to our local repository, so we’ll get a dialog re. saving the solution:

And now we’re finally ready to sync with Git:

We click on the link to go to the Unsynced Commits page, and enter the URL of our destination repository:

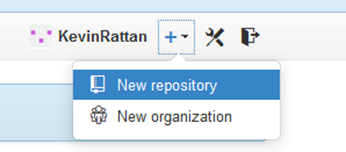
Except we don’t yet have a repository on GitHub. So next we need to open up a browser, go to GitHub, sign in and click on the Add | New Repository link.

I created a DynamicDataGitDemo public repository (as you have to pay for private ones, and I’m only really interested in GitHub for open source projects). I also chose not to add a ReadMe or a license just yet, as we want an empty repository for Visual Studio. We can always add a ReadMe and license later on.

And finally we have a repository and we’re ready to upload our source code:

For that, we need the https link that’s available on this screen (and later, elsewhere in the interface).

So we copy that into Visual Studio and then press Publish:

Which, not unsurprisingly, brings up a dialog asking us to provide our credentials (which we won’t have to do again if we allow it to remember them):

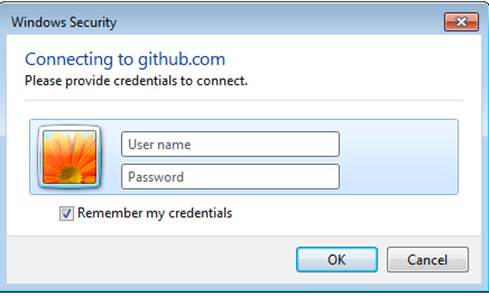
And that’s it. Enter your GitHub username and password, click OK, and your source code is saved to GitHub.

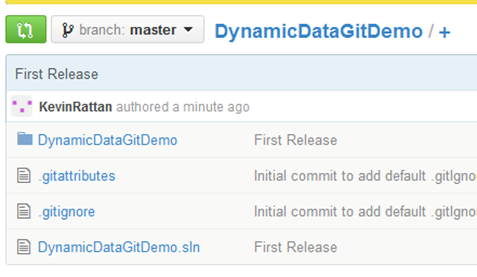
From that point on, you can push changes up from your local repository, or pull down changes from GitHub. On my DataAnnotationValidator project, I added a ReadMe file and a license via GitHub’s browser interface (the latter as a text file, as the tool only generates one on initial creation) and then used Visual Studio to pull them down to my local repository, as well as subsequently adding changes locally and pushing them back up.

Overall, it’s a lot less fiddly than it used to be – as are so many other things inside VS 2013.

Kevin Rattan

For other related information, check out these courses from Learning Tree:

Building ASP.NET Web Applications: Hands-On

Building Web Applications with ASP.NET MVC

Creating a Custom DNN Module and Integrating Captcha

I recently had a customer request to add a Contact Us form to their DNN installation. It’s something I hadn’t done for a while. In fact, it’s been so long that the language has changed. Last time I played around behind the scenes on DNN (or DotNetNuke as it then was), the language was VB only – this time, the installation is C#. It turned out to be a lot simpler than it was back then, and also gloriously easy to add captcha – another of the customer requirements, as they’re tired of receiving spam from online forms.

I’m guessing that this is something a number of the readers of this blog might need to do some time, so I thought I’d share the easy way to build a DNN form module that includes a captcha.

Getting DNN to Create the Module

The first step is to get DNN to create the Module for you. You’re going to do this twice – once on your development machine, and again on the live site.

I ran the development copy of the site from Visual Studio 2012 and logged in as the host. Then I did the following:

  1. Go to Host | Extensions

  1. On the Extensions page, select “Create New Module”

  1. In the dialog, there will initially be a single dropdown for “Create Module From”. Select “New”

  2. This will then open up more fields, and allow you to get DNN to do the hard work for you. You want to
    1. Define an owner folder – in this case I went with my company name as the outer folder
    2. Create a folder for this specific module – I’m creating a contact us form, so ContactUs seemed like a sensible name
    3. Come up with a name for the file and the module – I went with Contact for both, to distinguish the Contact module from the ContactUs folder.
    4. Provide a description so you’ll recognize what it is
    5. Tick the ‘create a test page’ option so you can check everything was wired up correctly

You can now close your browser and take a look at the structure DNN has created. We have a new folder structure underneath DesktopModules  – an outer Time2yak folder, and a nested ContactUs folder, complete with a Contact.ascx file:

If you open the web user control in the designer, this is what you get:

That’s given us a good starting point – but the first thing we’re going to do is delete the Contact.ascx user control. Just make sure you copy the value of the inherits attribute from the DotNetNuke.Entities.Modules.PortalModuleBase directive at the top of the ascx page before you delete it:

Creating the Web User Control

Now we’re going to create our own user control with a separate code behind page.

  1. Delete Contact.ascx and then right click on the folder and create a new Web User Control called Contact. This will recreate the ascx file, but this time with a code-behind file

  1. Change the definition of the code behind file so that it Inherits from DotNetNuke.Entities.Modules.PortalModuleBase (which is why you copied it).
  2. Now all you need to do is code the user control to do whatever you want it to do, just like any other ASP.NET Web Forms user control. I added a simple contact form with textboxes, labels, validation etc.:

  1. I then used DNN’s built in Captcha control. It’s easy to use, provided you don’t mind working in source view, rather than design (actually, I prefer source view, so this works well for me). You just need to
    1. Register the Control

    2. Add it to the page

    3. Check the IsValid property in the code behind (note the use of Portal.Email to get the admin email address).

Import the Module to the live site

This is the easiest part of all. Just use the same steps to create the module on the live server that you did in development, and then copy your version of contact.ascx over the version on the live site.  You now have the module in place and it appears in the modules list and can be added to any page you want:

And when you add it to the page, you have a Contact Us form with a captcha, developed as a DNN module:

The only other step is to use DNN to create the ThankYou.aspx page that the form passes through to – and that’s just a matter of using the CMS and doesn’t involve any coding.

Kevin Rattan

For other related information, check out these courses from Learning Tree:

Building ASP.NET Web Applications: Hands-On

Internationalizing ASP.NET MVC Applications

A couple of weeks ago I posted about internationalization with ASP.NET Web Forms. In this post, I’m going to look at how ASP.NET MVC handles internationalization. The good news is that you can localize in a broadly similar way and it’s still nice and easy. The bad news is that MVC does less for you and makes you jump through a few hoops to get it working.

What’s the same?

Resource files, for one thing.

What’s different?

You don’t use App_LocalResources, and Visual Studio doesn’t generate the keys in the resource file for you.

Let’s create the same basic page that we did with Web Forms – a contact form for sending an email. Here is the controller method, passing an Email model through to a strongly typed view Contact.cshtml:

And here is part of the View generated by Visual Studio 2012:

We want the labels to display appropriate text depending on the user’s language settings. In Web Forms, we can get the tools to generate a resource file with keys for relevant text. Here, we have to do it ourselves – and the resource files live with the views. I right-clicked on the Home folder and selected Add | Resources Files…

I called the first file Contact.resx. (The lack of a language specifier makes it the default). Then I went through and added the keys and values I wanted in English. Next, I copied it to create Contact.fr.resx and amended the values to my best guess at the French words I needed. (If someone speaks three languages, they are multi-lingual. If they speak two, they are bi-lingual. If they speak one… they are English. I am very English).

Here is the default file:

Here is the French version:

And here is the structure in Solution Explorer. Notice that the files are in the same folder as the views, NOT in App_LocalResources.

The next step is to tell our View to use the resources. I set the Custom Tool Namespace to Resources.Local to keep it nice and simple:

Then I used the second argument on LabelFor to specify the text, and passed in the relevant key from the resource file:

So everything should work now, right? We’ve created the resource files, pointed the views at them and it should all just work… Let’s run it and see:

Oops. It turns out the default protection level on the file is internal, which doesn’t work. You can use the dropdown at the top of the resource file to change it to public:

And here’s what you get in the Properties window – PublicRexXFileCodeGenerator rather than the default ResXFileCodeGenerator:

Now when we run it with English settings we get:

And when we pretend to be French, we get:

So, overall, it’s very similar to Web Forms, but just different enough to require a little extra work. You can also take an alternative approach and create separate views for each language. For me that’s a step too far, especially as I am likely to have mobile and standard views, and given that you can have device specific views as well, the complication soon increases exponentially. [Back in the 1990s, I worked on a project with 9 different versions of every page (IE, Netscape, Accessible IE, Accessible Netscape, Welsh IE, Welsh Netscape, Accessible Welsh… I can’t go on; the memory is just too painful) and I avoid view proliferation at all costs.]

There is, of course, more to internationalization than resource files. There’s programmatic control – letting your end user choose their language – and localizing strings that come from model classes, such as data annotation validation messages. So I may well return to internationalization again in a future blog post…

Kevin Rattan

For other related information, check out this course from Learning Tree:

Building Web Applications with ASP.NET MVC

Building ASP.NET Web Applications: Hands-On

Internationalizing ASP.NET Web Forms

I was in Rockville last week, acting as the BORG (Back Of the Room Guy) for another instructor. About half the students were attending remotely, using Learning Tree’s AnyWare system – and one of them was joining us all the way from Sweden, which meant he had a different keyboard layout. Fortunately, that was easily fixed… but it got me thinking about the issue of internationalization.

I go backwards and forwards between the US and UK and as a result I’m very conscious of the differences  between British and American English. One of the big issues is keeping straight whether 1/6/2013 represents Jan 6 (US) to 1 June (UK). It’s all too easy to use the wrong one in the wrong country – but so long as I remember which country I’m in, I normally manage okay.

But what about the web? If a user enters 1/6/2013 – what date do they mean? If the web page shows the date 1/6/2013, what does the user think it means?

The answer, of course, is that we can’t know – the user could be anywhere any speak any language. So we need to internationalize our applications. Fortunately, ASP.NET makes this very easy to do.

Here is a standard contact email form. Currently, it’s English only:

And here is the underlying markup. It’s a FormView control using Model Binding:

At the moment, everything is hard-coded. We want all the text (Name, From etc.) to change depending upon the browser’s language settings. For this we need a resource file. Fortunately, Visual Studio will create it for us. Just make sure you have focus on the page in question and go to TOOLS | Generate Local Resource. (If you’re using VS 2012 and you can’t see the option, try switching between design and source views and clicking in the page: it can be a bit temperamental).

This generates a resource file with the naming convention [FormName].aspx.resx inside the App_LocalResources folder (which will be created if it does not already exist). Our page is Contact.aspx, so the file is Contact.aspx.resx:

This is the generated resource file, which as you can see has all of our original text.

This resource file is then mapped to our controls through markup. Note the meta:resourcekey attributes that have been generated by the designer.

So far so good – but we still haven’t added any internationalization. What we need to do now is to copy our resource file and give it a conventional name that includes the language and country codes. I’m going to create a French version of my form, so I need to call it Contact.aspx.fr-FR.resx or if I wanted to use one version for all French speakers regardless of location, Contact.aspx.fr.resx

And then I need to create all the French versions of the strings. I don’t speak French, so this is part googling, part guess-work: my apologies to any actual French speakers….

Now if the user arrives at the site with French settings, they automatically get the following:

As you can see, it’s not at all difficult to internationalize your web applications. You can also use global resources, and you can of course internationalize MVC apps as well, and you probably want to give the user the option to change the language… and I may just come back to those topics in another post.

Kevin Rattan

For other related information, check out this course from Learning Tree:

Building ASP.NET Web Applications: Hands-On

New ASP.NET Training Course at Learning Tree

I was back in Learning Tree’s Reston offices last week, presenting the beta of my new ASP.NET course – Building ASP.NET Web Applications: Hands-On.  (The beta is part of our course development process where we try out the course in front of students for the first time.  Their feedback is an important part of refining exercises and slides to make sure that everything is clear, that all the exercises work as written and that we have the right balance of material).

I’ve been busy writing the course over the past few months, which is why this blog went very quiet for a while. The new course takes you all the way from explaining What is ASP.NET? through to building a multi-layer application using Code-First Entity Framework, the Web API and the HTML5 Geolocation API. (I put the course example online, so if you want to see what we build during the week, check out www.learningtreatz.com).

What’s so exciting about the new course? (Apart from the fact that I wrote it, of course…)

Well… there’s Visual Studio 2012….

A lot of people aren’t keen on the new monochrome look and – horrors – capitalized MENU items – but there are some really nice new features like Page Inspector and the new improved Add Reference dialog. Beyond that, it remains a very powerful development environment that makes web development a pleasure. And it means, of course, that we can develop with .NET 4.5 – and that means access to a host of cool new features. There’s the Web API:

And bundling & minimizing – which both reduces the size of your .css and .js files for production and makes sure that all your small files are combined into a single  large file, which is a big help in reducing download times for the client:

And there’s also out-of-the-box support for HTML5…

The class covers all these and more, and takes attendees from creating a simple Web Form at the beginning of the class right through to building a layered application with a Code-First Entity Framework data access layer, a business layer calling IQueryables in the data access layer and a UI that uses everything from combining Model Binding with the ListView through to providing an alternative jQuery Mobile view of the entire web site. So if you’re new to ASP.NET Web Forms or just want to refresh your skillset, why not give it a try!

This is me in full flow at the front of the class…

And helping an attendee with one of the exercises…

Kevin Rattan

For other related information, check out this course from Learning Tree:

Building ASP.NET Web Applications: Hands-On

Uploading to GitHub from Visual Studio

For a while now, my friend and fellow Learning Tree instructor Nigel Armstrong has been urging me to put my jQuery ratings plugin (jquery.rate) on GitHub. So today I finally decided to do something about it. I found it considerably more complicated than I expected – sufficiently so that I thought it might be useful to share the how-to with others and help them learn from my pain.

What I wanted was to upload files directly from Visual Studio to GitHub without having to mess around on the command line. I managed it… eventually. Here is what you need to do if you want to do the same.

First, join GitHub if you’re not already a member. This is the easy part! Once you’re a member, it’s trivial to create a new repository – just click on the link in the top right hand corner and follow the instructions

You’ll end up creating a simple .md documentation file that appears on the home page of your repository and tells people about it:

Okay – so that part was easy. Now the difficult part – getting the files you want into your repository from Visual Studio. The first thing you need to do is download and install the Git extensions – including installing the software dependencies if you don’t already have them on your machine. This will give you all the base things you need.

When it runs, it will come with a settings window which will initially have some red bars until you fill in all the necessary settings such as your email address):

Once that’s set up, you have to create a public/private key pair. You’re going to save the private key locally and upload the public key to GitHub. This is where it gets confusing. You’d think the key would be part of your setup, but it’s not. You need to run the actual Git Extensions GUI in order to set up your keys. It looks like this:

You need to click on the Remotes link at the top and then select PuTTY | Generate or import key.

You then get a dialog that asks you to move your mouse over the blank area to create randomness:

Once it’s complete, you are given the public and private keys. You need to save the private key somewhere safe (and passphrase protect it through the dialog) and you need to select and copy the public key with CTRL+C.

Now you’re ready to go back to GitHub and install the public key so you can connect to the repository using SSH. Log in to GitHub and click on the account link in the top right corner:

Then you need to click on SSH Keys in the menu, paste your public key into the form and give the key a name.

Phew! Now we’re ready for the next step – Visual Studio integration.

First, you need to download and install the Visual Studio Git Source Control Provider Extension. The best way to do this is via Tools | Extension Manager.

Once you have it installed, you can start using Git within Visual Studio. You’ll see the Git menu item. Go to your project and select Initialize new Repository.

This will open a dialog. Click on the Initialize button and you’ll see the Git tool, which I’ve docked below my main window here:

Then we need to set up our remote repository. Go back to that Git menu item and select Manage remotes.

That brings up this dialog – it’s asking for the URL of your repository.

Go back to your repository page on GitHub and select the SSH tab.

That will give you an SSH link in the textbox. Grab it and paste into the dialog

We’re almost done with connecting now, but if you click on the Test connection button at this point, you aren’t going to like what you see – a message telling you the host does not exist:

The trouble is we haven’t loaded our key yet. So now you browse for your private key and click the Load SSH button – somewhere along the line you’ll be asked to enter the passphrase you created earlier. Now when you test your connection, you’ll get something altogether more helpful and you’ll be asked if you want to cache the public key: enter y to do so, n to leave it uncached:

So now we can go ahead and start uploading stuff to the repository. The tool that I docked at the bottom of Visual Studio had a commit link. That should do it, right?

So, you click the checkbox beside the things you want to upload (in my case, the .js file and a zip with the samples/images etc.) and then click commit… and nothing happens. You need to push as well. So you right-click on the project in Solution Explorer and select Git | Push.

And it doesn’t work. The problem is, you haven’t downloaded the .md file that’s already in the repository, so you’re not synchronized. So, try again, but this time click on Pull instead of Push. That will download the .md file (though you won’t see it in Visual Studio unless you click on the refresh icon at the top of Solution Explorer). Now you’re ready to upload files by going back, selecting and committing them and then trying Push again. I also took the opportunity to enhance the .md file by adding a little more information and a link to the online samples. I made the changes insides Visual Studio:

Then I went through the commit- Push process again, and here is the revised file on GitHub:

So – simple, huh? Well, maybe not. But hopefully it will be a bit simpler for you than it was for me, now that I’ve written this blog post! And if you’re interested in downloading the plugin from GitHub: here it is.

Kevin Rattan

For other related information, check out this course from Learning Tree:

Building ASP.NET Web Applications: Hands-On

jQuery: A Comprehensive Hands-On Introduction

Web Forms Data Annotation Validation – Part 3

This is the third part in my look at Data Annotation validation in Web Forms in the Visual Studio 2012 Release Candidate. In the first part, I showed the server-side support for Data Annotation validation and model binding. In the second, I proposed one approach to providing client-side validation using jQuery plugins and a custom validator control that injects validation rules into the input element’s class attribute. The problem with that approach was an external dependency on the metadata plugin and the need to inject JavaScript into the page. So I got to thinking about how I might piggy-back on the unobtrusive validation support to produce a custom validator that worked in exactly the same way as the existing validators, but where the rules and messages were all derived from Data Annotations.

So the first thing to do was see how the existing validators work. I added various validators to a sample form and took a look at the underlying HTML. This is what I found:

client side unobtrusive attributes

There’s lots of interesting stuff here. The Text becomes the content of the span; the ErrorMessage is in data-val-errormessage; the validation method is in data-val-evaluation function; etc. If I can get my validator to read the Data Annotations and output the appropriate spans, that should give me the client-side validation I want.

I began in the same way as last time, by creating a new ASP.NET Web Control library and inheriting from the base validator. That code is in the previous posting, so I’m not going to repeat it here. (If you want to see the full code, I’ll put a link at the bottom of this post).

The reflection code is also the same, but one thing that is different is that this time I need to render HTML directly from the control, so I have to override the render method:

render method

The first thing I need is template for my span(s). I am going to put in {0} placeholders for the bits that need to change, and reuse the same basic string every time. Here is my template:

private static string template = “<span id=\”{0}\” data-val-evaluationfunction=\”{1}\” data-val=\”true\” data-val-errormessage=\”{2}\” data-val-controltovalidate=\”{3}\” {4} {5}>{6}</span>”;

Now, as I loop through the Data Annotations I can use string.Format() to fill in the blanks (note the += on the local spanString variable: that means I can add more spans if there are multiple annotations).

building the string

The arguments to the method are as follows:

  • this.ClientID is my current validator’s Id.
  • vat.ErrorMessage is the ErrorMessage from the Data Annotation.
  • c.ClientID is the control I am validating.
  • The string literals set up the validation for a required field
  • So where do display and message come from?

Display maps to the typical Validator display choices – static, dynamic and none. It’s initialized as style=”display: none;” data-val-display=”None” and overridden as appropriate. The message is the ErrorMessage to display in the control – as potentially overridden by the Text attribute.

message and display variables

So let’s add a reference inside our test web project and then add the new DataAnnotationValidator to the toolbox. Then we need to add a Required attribute to the Email class. (I added “DA” at the end of the message to confirm where the message was coming from).

required attribute

Then we need to set up the properties on our DataAnnotationValidator:

DataAnnotationValidator in aspx source

Now we can test it… and see that it works! We are now running client-side validation from Data Annotations, and it works and displays in exactly the same way as the other validators. And we have no additional dependencies and JavaScript injected into the page. Hurray.

working validation

Of course, we want to be able to validate other attributes as well. I went ahead and implemented several of them using the underlying RegularExpressionValidator. First I created a method to build all the regular expression spans:

regular expression builder

Then I called it from the various case statements for validation attributes:

switching attributes

Not forgetting the easiest one of all: the RegularExpressionAttribute itself:

RegularExpressionAttribute

Now I could play around with different values and messages in my Model….

Data Annotations

….and see my working Web Forms client-side Data Attribute validation:

validation working

I’ll probably refactor for robustness at some point, as well as adding support for additional attributes, but if you’re interested in the code for this version of the DataAnnotation validator, it’s online here: DataAnnotation2.txt.

Kevin Rattan

For other related information, check out these courses from Learning Tree:

Building Web Applications with ASP.NET and Ajax

Streamlined Web Loading in the Visual Studio 11 Beta

One of the features of Visual Studio 11 that I’m really looking forward to taking advantage of is CSS and JavaScript minification and bundling.

As developers, we like to be able to break our applications into reusable components. That makes development and maintenance much more manageable. Sometimes, however, it can have an impact on performance. The more CSS style sheets and JavaScript files you add to a page, the longer that page will take to download – and it’s not just a matter of the size of the files; the number itself is a problem. Http requests are expensive; the more you have, the slower your page is to load, even if the absolute size of the downloaded files is not very large.

Visual Studio 11 comes with two new features that make it more practical to break our JavaScript and CSS into multiple file. Bundling and minification give us a means of ‘componentizing’ our Web applications, without taking the performance hit of too many http requests. Bundling allows you to combine multiple files into a single larger file. Minification removes unnecessary white spaces to ensure that the new file is as small as possible. Taken together, the two techniques have a major impact on performance.

There are two versions of the functionality: the simple, automatic way; and the much more useful custom approach. In the simple version, the contents of folders are automatically bundled and minified if your <link> and <script> tags to point at the default directories and don’t specify individual files, thus:

<link href=”/Content/css” rel=”stylesheet” type=”text/css” />

That gets converted into html along these lines at runtime:

<link rel=”stylesheet” type=”text/css” href=“/Content/themes/base/css?v= UM624qf1uFt8dYtiIV9PCmYhsyeewBIwY4Ob0i8OdW81” />

That’s fine as far as it goes, but is also rather limiting. You have to use default locations, and there’s no scope for having different bundles for different versions of your application. In my www.cocktailsrus.com site, I have two distinct versions, for mobile and standard browsers, each of which requires different .css and .js files, so I need to be able to create custom bundles.

The MVC4 template comes with a feature that’s designed to support this – ResolveBundleUrl():

<link href=”@System.Web.Optimization.BundleTable.Bundles.ResolveBundleUrl (“~/Content/css”) rel=”stylesheet” type=”text/css” />

Now we can define our own custom bundles. In my case, I can create two new sub-folders under the style and script paths, one for mobiles and one for the standard Web site:

Then I change the paths passed to ResolveBundleUrl() to point at my new folders….

<link href=”@System.Web.Optimization.BundleTable.Bundles.ResolveBundleUrl(“~/Content/site/css”) rel=”stylesheet” type=”text/css” />

<script src=”@System.Web.Optimization.BundleTable.Bundles.ResolveBundleUrl(“~/Scripts/site/js”)“></script>

and… it doesn’t work.

Although ResolveBundleUrl() supports adding non-default paths, you have to do a little more work and register your new paths in the application start event in the Global.asax before it can use those paths.

code in the global asax adding bundles

This tells the system that we’re adding two bundles – one for .css files and one for .js, and that all the files in the specified directories should be part of the bundle. (You can also specify individual files if you need to control the loading order beyond the default settings, which first prioritize known libraries like jQuery, then load the files alphabetically).

One nice additional feature is that the bundles are cached on the browser using the generated path (e.g. css?v=UM624qf1uFt8dYtiIV9PCmYhsyeewBIwY4Ob0i8OdW81). This means that not only are they loaded faster the first time the user visits the site, they do not need to be downloaded again the next time. More significantly, if any of the files in the bundled folder changes, so does the generated path. That means your users will never be stuck with old versions of your style sheets or JavaScript files.

Kevin Rattan

For related information, check out these courses from Learning Tree:

Building Web Applications with ASP.NET and Ajax

Building Web Applications with ASP.NET MVC

Simplifying Web Development with Page Inspector

I’ve been playing around with the Visual Studio 11 beta for a little while now, and my favorite thing so far is Page Inspector. I like tools that make my life easier – and Page Inspector just saved me a lot of poking around inside the underbelly of an application.

I have been busy porting my cocktails application to MVC4, Entity Framework 4.5 and Visual Studio 11 ready for its release later this year. It has all gone rather smoothly so far, with the biggest problem being that it doesn’t seem to like the System.Transactions namespace. (So I’ve commented out the transactions for the time being and pressed on – I’ll come back to that when I’ve played with some of the new stuff). I managed to recreate my Entity Model using the latest version, created a new MVC4 project and selectively imported my Web site content–and pretty soon I had the site up and running in Visual Studio 11.

When you’re upgrading, the easiest problems to fix are the breaking errors. You run the project, it blows up – you see that you need to add a missing reference. The more difficult problems arise when something works, but not as you expect. And that’s where Page Inspector became enormously useful.

So what is Page Inspector?

Essentially, it’s a tool that takes the DOM inspection approach of client-side tools like Firebug and the IE Developer Toolbar and applies it server-side. You can click on an element on the page, and not only do you get to see the HTML and the CSS – you also get the server-side files that are responsible for that part of the page. Here is a screenshot, showing Page Inspector on the left.

screenshot of page inspector

In the image, I’ve clicked on the selection icon to put Page Inspector in selection mode. This is what the selection icon looks like:

the selection icon

Once I’ve done that, the panel on the right shows me the server context that provides that section of the page.

And how did Page Inspector help?

I noticed that the new MVC4 internet template offered some improvements to the login process (e.g., Ajax) so I wanted to use the new version rather than the current version. I changed the layout pages to point at the new partial page and then ran the app, only for this to happen when I clicked on the login link:

404 error

So I went back to the page with the link in Page Inspector, hit the selection tool and clicked on the login link – which showed me I was still using the old partial page after all.

page discovered via page inspector

So what had I missed? In the old days (i.e., yesterday) I would have had to:

  • Infer that I was still on the old partial page
  • Work out where that partial page was being referenced from
  • Trawl through the site to find the layout page and make the change

Now all I had to do was…

  • Click on the selection tool to activate it
  • Select the HTML element that contained the Log in link

… and there in the right hand panel was the layout page I’d forgotten to change:

layout page discovered via page inspector

What’s more – I could make the change there and then while Page Inspector was still open.

correcting while inspecting

Page Inspector then told me the source had changed and offered me the opportunity to refresh the page.

warning out of synch

The text then changed from “Log on” to “Log in” – so I could see at once that the correction had been successful.

corrected page

So far, I like Visual Studio 11 a lot. I’ll keep you posted on anything else I find out (both good and bad) as I work through the conversion.

Kevin Rattan

For related information, check out these courses from Learning Tree:

Building Web Applications with ASP.NET and Ajax

Building Web Applications with ASP.NET MVC

Visual Studio Tips – Wildcard Search and Replace

Ever wanted to do a wildcard Search and Replace in Visual Studio? I don’t just mean finding things using wildcards, but selectively replacing part of what you find while leaving other parts untouched. I came across an example recently where I needed to do just that – and since what I discovered saved me an inordinate amount of work, I thought I’d share it with you.

I was asked to look over the code for an ASP.NET Web Forms web site with a Sql Server back end. When I looked into the code, however, I discovered that the database was actually MySql… which I don’t support. I managed to migrate the database over to Sql Server, but then found that although the project used NHibernate, much of the data access code was written as inline SQL in the code-behind pages. And that code wouldn’t work with Sql Server.

The problem was primarily lots of code along these lines:

      rs.GetString(“ColumnName”)

Unfortunately, this code errors with the Sql Server driver because GetString() only accepts integers. I needed to keep the variable name, but change the code so that it was something like this:

     rs[“ColumnName”].ToString();

And there were a huge number of column names and GetXXX() methods that needed changing.

So I did a little research, and discovered that there’s an option to use regular expressions in the Find and Replace dialog.

find options in find and replace dialog

Crucially, you can use Regular Expressions for both find and replace. So I was able to enter the following find string:

   rs.GetString\(“{.@}”\);

and the following replace string:

   rs[“\1”].ToString();

And change all the GetStrings() for all of the columns in one simple Find and Replace – thus avoiding a great deal of tedious and repetitive work.  Here’s hoping I’ve saved you some of the same.

Kevin Rattan

For other related information, check out these courses from Learning Tree:

Building Web Applications with ASP.NET MVC

Building Web Applications with ASP.NET and Ajax


Learning Tree International

.NET & Visual Studio Courses

Learning Tree offers over 210 IT training and Management courses, including a full curriculum of .NET training courses.

Free White Papers

Questions on current IT or Management topics? Access our Complete Online Resource Library of over 65 White Papers, Articles and Podcasts

Enter your email address to subscribe to this blog and receive notifications of new posts by e-mail.

Join 29 other subscribers
Follow Learning Tree on Twitter

Archives

Do you need a customized .NET training solution delivered at your facility?

Last year Learning Tree held nearly 2,500 on-site training events worldwide. To find out more about hosting one at your location, click here for a free consultation.
Live, online training