Posts Tagged 'C#'

Creating a Custom DNN Module and Integrating Captcha

I recently had a customer request to add a Contact Us form to their DNN installation. It’s something I hadn’t done for a while. In fact, it’s been so long that the language has changed. Last time I played around behind the scenes on DNN (or DotNetNuke as it then was), the language was VB only – this time, the installation is C#. It turned out to be a lot simpler than it was back then, and also gloriously easy to add captcha – another of the customer requirements, as they’re tired of receiving spam from online forms.

I’m guessing that this is something a number of the readers of this blog might need to do some time, so I thought I’d share the easy way to build a DNN form module that includes a captcha.

Getting DNN to Create the Module

The first step is to get DNN to create the Module for you. You’re going to do this twice – once on your development machine, and again on the live site.

I ran the development copy of the site from Visual Studio 2012 and logged in as the host. Then I did the following:

  1. Go to Host | Extensions

  1. On the Extensions page, select “Create New Module”

  1. In the dialog, there will initially be a single dropdown for “Create Module From”. Select “New”

  2. This will then open up more fields, and allow you to get DNN to do the hard work for you. You want to
    1. Define an owner folder – in this case I went with my company name as the outer folder
    2. Create a folder for this specific module – I’m creating a contact us form, so ContactUs seemed like a sensible name
    3. Come up with a name for the file and the module – I went with Contact for both, to distinguish the Contact module from the ContactUs folder.
    4. Provide a description so you’ll recognize what it is
    5. Tick the ‘create a test page’ option so you can check everything was wired up correctly

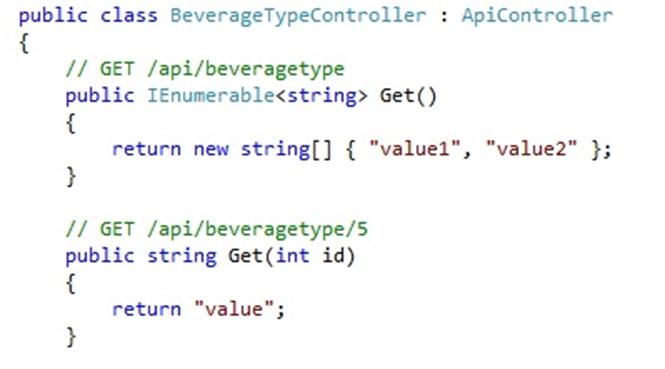
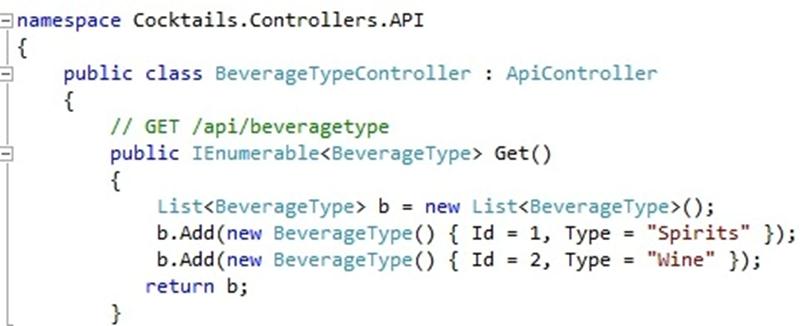
You can now close your browser and take a look at the structure DNN has created. We have a new folder structure underneath DesktopModules  – an outer Time2yak folder, and a nested ContactUs folder, complete with a Contact.ascx file:

If you open the web user control in the designer, this is what you get:

That’s given us a good starting point – but the first thing we’re going to do is delete the Contact.ascx user control. Just make sure you copy the value of the inherits attribute from the DotNetNuke.Entities.Modules.PortalModuleBase directive at the top of the ascx page before you delete it:

Creating the Web User Control

Now we’re going to create our own user control with a separate code behind page.

  1. Delete Contact.ascx and then right click on the folder and create a new Web User Control called Contact. This will recreate the ascx file, but this time with a code-behind file

  1. Change the definition of the code behind file so that it Inherits from DotNetNuke.Entities.Modules.PortalModuleBase (which is why you copied it).
  2. Now all you need to do is code the user control to do whatever you want it to do, just like any other ASP.NET Web Forms user control. I added a simple contact form with textboxes, labels, validation etc.:

  1. I then used DNN’s built in Captcha control. It’s easy to use, provided you don’t mind working in source view, rather than design (actually, I prefer source view, so this works well for me). You just need to
    1. Register the Control

    2. Add it to the page

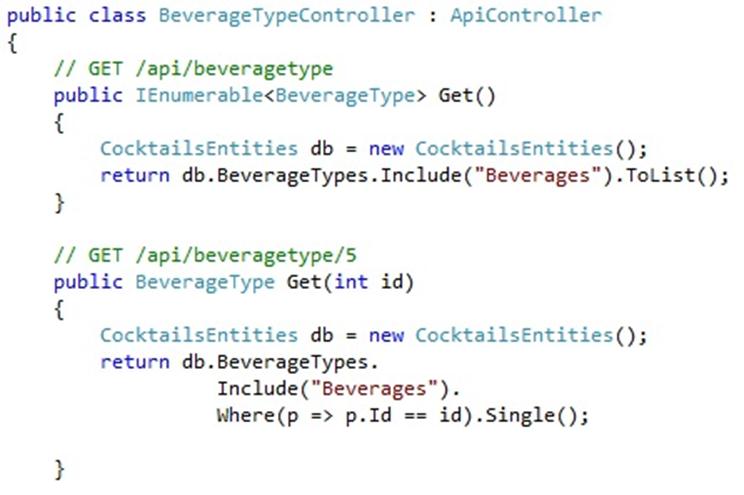
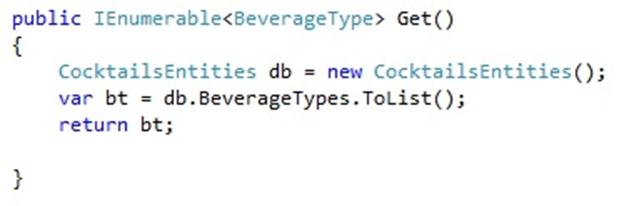
    3. Check the IsValid property in the code behind (note the use of Portal.Email to get the admin email address).

Import the Module to the live site

This is the easiest part of all. Just use the same steps to create the module on the live server that you did in development, and then copy your version of contact.ascx over the version on the live site.  You now have the module in place and it appears in the modules list and can be added to any page you want:

And when you add it to the page, you have a Contact Us form with a captcha, developed as a DNN module:

The only other step is to use DNN to create the ThankYou.aspx page that the form passes through to – and that’s just a matter of using the CMS and doesn’t involve any coding.

Kevin Rattan

For other related information, check out these courses from Learning Tree:

Building ASP.NET Web Applications: Hands-On

Working with SSL at Design Time with IIS Express

One issue that arose from my planned switch to serving images from Amazon S3 was: how to deal with HTTPS?

Hitherto, that’s been a non-issue. I used a relative path for images so the switch between HTTP and HTTPS happened automatically and painlessly. Now, of course, there is a potential problem. I have to use fully qualified paths for the images – and if an HTTPS page tries to serve images over HTTP, the browser will give the end user a warning about mixed content. So what to do?

The solution, of course, is to switch the images over to HTTPS along with the rest of the page. S3 supports HTTPS, so that’s fine – but there are still a couple of questions:

  1. How to manage switching over to HTTPS?
  2. How to test it in the development environment?

I’ll deal with the second one first. One of the nice things about Visual Studio 2012 is that it comes with IIS Express as the development server. That means you can use and test HTTPS/SSL during development. All you have to do is select the website in Solution Explorer and then change the property setting to enable SSL.

properties window

That’s it. Now, if you browse to the alternative URL you have HTTPS. You’ll get a warning message because there’s no certificate, but the functionality is all there.

So now we can write code to switch to HTTPS for images and test whether it actually worked.

I decided the easiest thing to do was have two configuration settings – one for standard images and one for HTTPS images. Here is the main configuration for the development setup (I left HTTP as relative, and just switched to a full path for HTTPS):

configuration

And here is the configuration transform for deployment to the live setup:

configuration transform

Now the question is – where to pick this up? In the current/old version, I set a ViewBag variable inside the base controller’s constructor. I can’t do that now because I need to find out whether the request uses HTTPS… and the context is not available inside the constructor. So it’s back to the drawing board. I don’t want to have to repeat the code, and I can’t use inheritance to get what I want… so it’s time for attribute based programming – in this case, with an action  filter. As the View is about to execute I check if the Request is over HTTPS, and switch the path appropriately.

Code sample OnResultExecuting

I’m checking that this is a ViewResult, so I can safely add this as a global filter without have to worry about methods that don’t return views:

Code sample register global filters

So now when I switch over to HTTPS, my path switches appropriately, and I don’t get annoying messages about delivering mixed content:

working ssl

Kevin Rattan

For other related information, check out this course from Learning Tree:

Building Web Applications with ASP.NET MVC

Building Web Applications with ASP.NET and Ajax

Serving Images from Amazon S3

One issue that’s been nagging me as I refactor www.cocktailsrus.com from a RAD site focused on jQuery Mobile to a properly architected site that just happens to use jQuery Mobile is the way I’ve been storing images on the file system. The file system approach is quick and easy and doesn’t clog the database with lots of BLOB data… but it’s also not at all future proofed for moving to a web farm environment. I don’t want to have to deal with synchronizing files across multiple servers, so what to do?

In the old days (like, maybe last year) I’d probably have bitten the bullet and saved the images into the database. But these days we have so much more choice – and since I’m hosting on Amazon EC2 and using Amazon’s easy mail service, then the obvious step is to use Amazon S3 (Simple Storage Service).

S3 isn’t just for images – you can store anything you want – but it makes a natural choice for image hosting. (You can also store your private files there if you want – S3 is private by default). With your images in S3, all your web farm servers are saving to the same place so there’s no longer any need to synchronize between servers – and, as usual with AWS, it’s very cheap.

You need to sign up with AWS to get an account. Then pick S3 from the bewildering array of services available.

amazon AWS services

Once you’ve signed up for S3, you can then create a bucket (don’t pick a name with a dot in it – that just makes life more complicated later on).

creating a bucket

And once the bucket is created, you can use the AWS web interface to upload files.uploading files

So – you have an online storage bucket and you can add and remove files. Now for the next step – doing so programmatically.

The first thing you need is the AWS SDK. The easiest thing to do is install it via NuGet.

The AWS SDK NuGet

The SDK comes with samples, so it’s easy to get up and running. You need to add a reference to the SDK in your project, and then work with the AmazonS3 object, which is created for you by the Amazon.AWSClientFactory.

You can upload files from your hard drive or file streams. In my case, I resize images and create thumbnails from uploaded files so I use the stream approach. Here is my code creating the AmazonS3 object and passing it through to a method that does the actual writing (note the using block – the AmazonS3 object implements IDisposable):

code sample using AmazonS3

And here is the code doing the actual write to amazonS3. (The bucketName variable in the code sample is a private static string variable “cocktailsrus.” The keyName is your unique filename for the new image):

code sample PutObject:

(In order for the above code to work, you will also need to have set up two configuration keys – one for your AwsAccessKey, the other for AwsSecretKey).

So now I have a bucket and I have code to write my images to the cloud. I’m all set, right? Well, almost – because there’s the small issue of the bucket being private by default. I’ll deal with that issue and a few other niceties of setting up S3 to serve images in my next post.

Kevin Rattan

For related information, check out these courses from Learning Tree:

Cloud Computing with Amazon Web Services

Building Web Applications with ASP.NET MVC

Output Caching and Authenticated Users

In a recent post, I looked at using a custom parameter with OutputCache to provide different versions of an ASP.NET MVC view to different clients (mobile/traditional devices, AJAX / no-AJAX clients). The one question left unaddressed, however, was: what if there are some circumstances where you don’t want to cache at all?

Output caching means that your code runs once to provide the output, then doesn’t run again until the caching period has expired. In my example, that meant it would run four times for my different circumstances, but not again for each individual circumstance until the timeout had expired. But it turns out that isn’t sufficient to my needs. If the user is logged in, the code needs to run every time.

CocktailsRUs is a community site. Anyone can join, and when they join, they can mark cocktails as favorites for ease of access. Every time they view a cocktail, they can choose to add it to (or remove it from) their favorites, and thus be presented with the appropriate button to add or remove a favorite.

screengrab of remove favorite button

So how do we stop the site from using output caching with authenticated users?

One quick and (very) dirty approach would be to use the GetVaryByCustomString() method to assign a unique value (a timestamp or a GUID) as the cache key for authenticated users. That would ensure the code runs every time, but would also lead to a plethora of unwanted pages in the cache.

Fortunately, there is a much better solution. The Output Cache exposes a callback that allows you to decide whether to return the cached item, or run the code. We can use this callback to determine if the user is authenticated–and if they are, invalidate the cache for this response.

The first thing we need to do is create our own derived version of the Output Cache. That’s straightforward–just inherit from OutputCacheAttribute like so:

inheritance code sample

Then we need to override the OnActionExecuting() method to set up the callback where we will invalidate the cache:

OnActionExecuting code sample

Now all we need to do is implement our OnlyIfAnonymous() method and tell it not to cache if this is an authenticated user. The signature of AddValidationCallback gives us access to the HttpContext, an optional data object (which we don’t need) and the HttpValidationStatus–which is passed in by reference and allows us to ignore the cache for this request. Here is the completed method:

Callback code sample

The one remaining step is to replace the OutputCache directive on our controller method with a reference to our new OnlyUnAuthenticated attribute.

Attribute code sample

Now we have a solution that caches appropriately for anonymous users, but ensures that the code runs every time for authenticated users.

Kevin Rattan

For related information, check out these courses from Learning Tree:

Building Web Applications with ASP.NET MVC

Building Web Applications with ASP.NET and AJAX

Exposing IQueryable/oData Endpoints With Web API

This is a follow on from my post on Web API and the Entity Framework. In that post, I showed a couple of approaches to dealing with JSON serialization problems in the Visual Studio 11 beta. Now I want to look at returning IQueryable from Web API methods.

IQueryable allows you to do what it says on the box: return an object that can be queried from the client. In other words, you can pass through arguments that tell the server what data to retrieve. This is a hot topic on the Web, with some people strongly against the idea and some strongly for it. The argument is between convenience (look how easy it is to get any data I want!) and security/architecture (look how easy it is for someone else to get any data they want).

I don’t have strong views either way. I share the concerns of those who worry about leaving client layers free to bombard the data layer with inappropriate (and potentially dangerous) queries, but I also like the convenience of being able to shape my queries from the client—especially given the Web API’s (partial) support of the oData specification. (For those unfamiliar with oData, it allows you to use querystring arguments to modify the query at the server, e.g., $top=10 will become .Take(10) in the EF query).

If I don’t use IQuerable, I will need to write lots of different methods to allow for different queries (e.g., in cocktails-r-us, I need to search for cocktails by beverage, non-liquid ingredient, name, id, etc.). Here is a simple example from my demo project, with two methods:  one returning an IEnumerable of BeverageTypes, the other a single BeverageType by id:

original version of code

If I want to get an individual BeverageType, I make a get request along these lines: http://%5Bmysite%5D/api/beveragetype/2. Here is the Firebug output from such a request:

output from non-oData request

If I switch to IQueryable as the return type, however, I can supply both queries from a single method (note the addition of ‘AsQuerable()’ at the end of the method return):

IQueryable version of the code

Now I can write my oData query as “http://%5BMySite%5D/api/beveragetype?$filter=id eq 2“, so I no longer need my separate specialized method.

screenshot of oData request and result

Let’s try and simplify the method. The oData specification allows us to expand associations using $expand, so let’s remove the .Include(“Beverages”) call from our method and pass that through on the querystring as follows: http://%5BMySite%5D/api/beveragetype?$filter=id eq 2&$expand=Beverages.

Here is the new code:

code without include

And here is the result… not quite what we were hoping for:

result of $expand - no include

It turns out that the Web API does not support $expand…. And I rather hope it never does. If Web API supported $expand, then my users would be able to create huge queries with far too many joins. In cocktails-r-us, I only want to return all the details of a cocktail (ingredients, comments, ratings, related cocktails, etc.) for one cocktail at a time. I don’t want users to be able to join all those tables in one massive query. So, that’s the upside. The downside is that I have to go back to using multiple methods, but even then I should only need two:  one to get a specific cocktail (or, in this case, BeverageType) by ID, the other to return lists of them by whatever criteria the client prefers.

final version of two methods

Since I can deal with security concerns by forcing my clients to authenticate (and only giving access to trusted developers in the first place), and that leaves me with only one concern: will my client developers write ill-advised queries? They might, for example return too many rows at once instead of paginating through the data as I would prefer. Fortunately, there is a solution: the [ResultLimit(n)] attribute. This restricts the number of items returned. So now our remote users will have to page through the data rather than return it all at once.

ResultLimit attribute

If we examine the output in Firefox/Firebug, you can see that only 5 rows are returned even though the query requested all the rows:

output with limit in place

ResultLimit is not a perfect solution. It only restricts the number of items returned from the method, not the number retrieved from the database. Here is what’s happening on the server:

Results on server

However, since the remote user won’t be able to get the data they want the easy way, they will be forced to write oData pagination queries like “http://%5Bsite%5D/api/beveragetype?$skip=5&$top=5&$orderby=Type desc” which would give them the following output on the client:

oData paginated query

I understand why people are nervous about exposing IQueryable, and I wouldn’t do it in a completely open way where anyone’s code can access my data without authentication, but I love its openness and flexibility and the way it works so easily with Web API.

Kevin Rattan

For related information, check out this course from Learning Tree: Building Web Applications with ASP.NET MVC.

Working With the Entity Framework and the Web API

In my last post, I talked about the new Web API controllers in MVC and showed how they work with simple data. In the real world, of course, I want them to work with my existing data, which uses Entity Framework. It turns out that this is far from straightforward (at least, in the beta).

Let’s start by trying to expose some standard EF data. When I began coding my personal website www.cocktailsrus.com I used model-first rather than code-first development. (At that point, my focus was on getting to know jQuery mobile, and I was not concerned with best practices in MVC; I have refactored it since). So let’s go back to basics and begin with an .edmx version of the simple data I used in my last post.

beverageType in designer

The code to return this object using Entity Framework and Web API is as follows (with the result first placed into a  variable  so I can more easily examine the return in the debugger):

code to return IEnumerable of BeverageType

When we try and access this in Internet Explorer, we get the following error message:

“The type ‘BeverageType’ cannot be serialized to JSON because its IsReference setting is ‘True’. The JSON format does not support references because there is no standardized format for representing references. To enable serialization, disable the IsReference setting on the type or an appropriate parent class of the type.”

Interestingly, if we use Firefox, it actually works–but here the response is formatted as XML. Still, that suggests we’re almost there. Let’s make it more interesting. Let’s add an Association to our .edmx file to make it more realistic.

design view of association

And let’s add an Include to our Entity Framework code so that we return the Association along with our object:

code with include

Strangely, we get exactly the same results as before. Internet Explorer gives the same JSON error message. Firefox returns the same XML, without the association. Perhaps turning off LazyLoading will improve the Firefox return?

code removing lazy loading

Sadly, it makes no difference. We get exactly the same error, and since there is no convenient way to change the IsReference setting in an .edmx, perhaps it’s time to switch to Code First Generation and see if we can’t return JSON properly to Internet Explorer.

Here are my types:

code first types

And here is my DbContext:

code first dbcontext

Let’s run it again and see what happens now… And yes–this time, we’ve managed to break both Internet Explorer and Firefox! Both get the following error message:

“You must write an attribute ‘type’=’object’ after writing the attribute with local name ‘__type’. ”

Now, this error is actually useful. It tells us we need to turn off proxy generation, so let’s tweak our DbContext. And we may as well turn of lazy loading here while we’re at it:

turning off proxy creation

Now the Web API makes a valiant effort, sends through the beginning of a JSON version of the data to both IE and Firefox, and then gives up with an error message:

screen capture error

Here is the error message:

“System.Runtime.Serialization.SerializationException: Object graph for type ‘Beverage’ contains cycles and cannot be serialized if reference tracking is disabled.”

At this point, I imagine we’re all starting to get a little frustrated. I know I am. So, to cut a long story (and a lot of Web searching) short… it looks like the fundamental problem lies in the interaction between the Entity Framework and the DataContractSerializer used in the beta. This is supposed to be fixed by a change to the JSON.Net serializer when Web API goes live – but in the meantime, what to do?

There are two possible approaches (and I’ve placed the code for both online here):

  1. Substitute the JSON.Net serializer in place of the default. For this, you need first to follow the helpful instructions in this blog post: http://blogs.msdn.com/b/henrikn/archive/2012/02/18/using-json-net-with-asp-net-web-api.aspx and then
    1. Add an instruction to the serializer to ignore self-referencing loops
    2. Add the new serializer in the Global.asax
  2. Use projection. The suggestions online seem to fall into two camps:
    1. Use projection with anonymous objects.
    2. Use projection with Data Transfer Objects.

But if I did want to use projection, why would I want to:

  1. return anonymous objects when I have perfectly good POCO objects, or
  2. create new DTOs when I already have perfectly good POCO objects?

So I wondered what would happen if I used projection with the same POCO Code First objects that the serializer had choked on when I returned them directly…

projection using code first poco objects

And here is the result in Firefox/Firebug:

output from projection

And in Internet Explorer/F12 Developer Tools

output in IE:

The Web API is going to be great, but it takes a little work if you’re using the beta. If you want to look at the code for either solution I outlined above, it’s available here. (The full project is 13MB, even as a zip, so I just put up the code: if you want it to run, you’ll need to copy the files into a VS11 project and download the various Nugets, as well as getting EF to generate the database for you).

In my next article, I’m going to take a look at the thorny issue of whether to return an IQueryable and—if you do choose to do so—how you can protect yourself against over-large queries.

Kevin Rattan

For related information, check out this course from Learning Tree:  Building Web Applications with ASP.NET MVC.

Building RESTful Services with Web API

One of the features I’ve most been looking forward to in the Visual Studio 11 beta is the Web API. It’s been my long-term goal to build an iPhone app to supplement my jQuery mobile view for my personal website, www.cocktailsrus.com (once I learn Objective-C), and a RESTful API is just what I need. In this post, I’m going to explain what the Web API is and how you can use it. In subsequent posts, I’ll look at the issues with combining Web API controllers with Entity Framework data, and the thorny issue of whether to expose oData/IQueryable endpoints. There’s a lot of ground to cover, so let’s get started.

What is the Web API?

The Web API is a new feature of the latest release of ASP.NET MVC. It adds a new controller base type, ApiController, which allows you to return JSON data directly from RESTful urls. (It was always possible to return JSON from Controllers by using the Json() method, but ApiControllers don’t return views, just serialized data. We can also easily expose oData endpoints: more on that in a later post.)

The Add Controller wizard now has new options:

The controller wizard

When you select an empty API controller with read/write actions, you get a basic stubbed template as a starting point:

The empty controller

There are a couple of changes I need to make at the outset:

  1. I want to return a list of BeverageTypes (spirits, non-alcoholic, wine, etc.) rather than a string array,
  2. I already have a BeverageTypeController as part of my MVC application, so I need to change the namespace from the default (in this case, Cocktails.Controllers) to Cocktails.Controllers.API to avoid a name collision.

Here is part of the changed class with a little sample data for testing purposes:

Method returning IEnumerable

Now I can make the following RESTful query “http://%5Bsite%5D/api/BeverageType” and get back JSON data:

Output from the RESTful call

The controller also stubbed out another method for me that accepted an id argument. With a little refactoring to move my data into a separate method – BeverageTypes() – I can now write code like this:

Get with an argument

Now I can make a RESTful query with an argument, thus – “http://%5Bsite%5D/api/BeverageType/1“:

output from the call

So, it looks like I have a nice, simple way of exposing my data as a RESTful API from within an ASP.NET MVC application. I should be able to consume my data from new clients and/or allow third parties to integrate with my site. Unfortunately, it turns out that once you add the Entity Framework into the mix, things get a whole lot more complicated – and that’s going to be the topic of my next post.

Kevin Rattan

For related courses, check out Building Web Applications with ASP.NET MVC from Learning Tree.

How to Use ViewModels Without Sacrificing Encapsulation

I have been using ASP.NET MVC extensively over the past year, and the more I use it, the more I like it. However, there remain a couple of things that bug me. One is the fact that the built-in validation doesn’t work with repeating forms. The other is the “best practice” of placing Data Annotations on a ViewModel class.

For me, validation rules belong on the business object itself, not on the ViewModel. One of the key benefits of encapsulation is that we reduce code duplication. If we don’t encapsulate the validation rules inside the object, then we are doomed to repeat them once for every presentation layer. Data Annotations in an MVC ViewModel are not available to a WPF UI. Not only does this lead to redundancy, it increases the risk of inconsistencies cropping up between UI.

So no problem, you might think. All we have to do is add the Data Annotations to the Model itself, and then add the Model as a property of the ViewModel.

Okay, let’s try that.

Here is the Model:

BasicClass simple C# class

And here is the ViewModel:

The ViewModel class

This looks straightforward enough. But look at what happens when we ask Visual Studio to scaffold the View:

View scaffolding

What happened to our “Basic” Model property? It’s not there. The scaffolding only seems to work for simple properties.

Okay, so let’s add the details of the Model to the View. In fact, let’s cheat. We’ll get Visual Studio to scaffold the inner Model for us. First we’ll create a throwaway View. Then we copy the contents of the form and paste it into the View that’s typed to the ViewModel. All we have to do then is change the lambda expressions to point at model.Basic rather than just model:

Full scaffolding

Problem solved. The View now contains the data we need and also respects our data annotations…

This means we can pass the ViewModel through to a Controller method and pick up the Model we need via the ViewModel’s “Basic” property. There’s only one problem:  How do we use the UpdateModel() method when we’re only interested in a property on the object passed to the method, rather than the whole object? Fortunately, Microsoft anticipated the need and there’s an overload on UpdateModel() that allows us to specify a prefix. In this case, not surprisingly, the HTML helpers have inserted the prefix “Basic”:

UpdateModel() with second argument

As you can see, the Model has successfully been bound, so we now have a mechanism for taking advantage of ViewModels without sacrificing encapsulation.

Kevin Rattan

For related information, check out Building Web Applications with ASP.NET MVC from Learning Tree.

Sending SMTP Email with Amazon SES and C#

For a while now I’d been meaning to add a ‘contact us’ page to www.cocktailsrus.com and I finally got around to it this week.

Sending SMTP email is very straightforward – but you do need to have access to an SMTP server. I suppose I could have just turned on the SMTP component in Windows 2008, but I’m hosting on Amazon’s Elastic Cloud Compute infrastructure and thought there had to be a better way… And there is: the Amazon Simple Email Service. And, as it turns out, you can use it even if you don’t host on EC2.

First, you have to go to amazon and sign up for the simple email service – which means signing up to use Amazon Web Services. Once you do so, you’re given a sandbox in which to play… or, in this case, send emails. You need to verify the email addresses you send from (to make sure that you’re not an evil spammer) and then you can send test messages either from the online interface or programmatically. Once you’re through with testing, you can ask for production access – and once that’s granted, you can send up to 2,000 emails a day (and up to 1GB of data transfer per month) for free. If you want to send more, then you will start incurring costs – but, as ever with EC2, those costs are more than reasonable.

So – the big picture: you get to send lots of emails for free, and someone else is responsible for maintaining and securing the SMTP server.

And best of all – it works when you’re testing on your development machine as well as on the live box. Nice.

The only remaining problem is that you can’t just change the server name in your existing .NET code 😦. Now that you’re using Amazon’s service, you need to download the AWS SDK (it’s available as a NuGet) and program against the Amazon objects. The following code relies on using statements for Amazon.SimpleEmail and Amazon.SimpleEmail.Model, and also the following keys in the Web.config:

<add key=FromEmailAddress value=[Enter verified email address here] />
<add key=AwsAccessKey value=[Enter your access key here] />
<add key=AwsSecretKey value=[Enter your secret key here] />

Once you have those set, the minimum code to send emails is along the following lines:

public static void SendEmail(EmailViewModel email, List toAddresses)
{
    AmazonSimpleEmailServiceConfig amazonConfiguration =
	new AmazonSimpleEmailServiceConfig();
    AmazonSimpleEmailServiceClient client =
	new AmazonSimpleEmailServiceClient(
		ConfigurationManager.AppSettings.Get("AwsAccessKey").ToString(),
                ConfigurationManager.AppSettings.Get("AwsSecretKey").ToString(),
                amazonConfiguration);
    Destination destination = new Destination();
    destination.ToAddresses = toAddresses;
    Body body = new Body() { Html = new Content(email.Body) };
    Content subject = new Content(email.Subject);
    Message message = new Message(subject, body);
    SendEmailRequest sendEmailRequest =
	new SendEmailRequest(
		ConfigurationManager.AppSettings.Get("FromEmailAddress"),
		destination,
		message);
    client.SendEmail(sendEmailRequest);
}

The secret key is sent securely by default, by the way, so you don’t need to worry about compromising it.  There are, of course, other things you can do (like checking the response to see if you had any problems sending the email) but the only complication I’ve had to deal with so far is the fact that I can’t just hit reply to emails from users.  The problem, of course, is that you can only send from verified addresses.  The solution is to add a mailto: inside the email. As problems go, it’s pretty trivial – and very much out-weighed by the benefits of not having to set up and use my own SMTP server.

Kevin Rattan

For other related information, check out these courses from Learning Tree:

Building Web Applications with ASP.NET MVC

Building Web Applications with ASP.NET and Ajax

Cloud Computing Technologies: A Comprehensive Hands-On Introduction

Cloud Computing with Amazon Web Services

Improved Device Detection with ASP.NET

This is a follow up to my last post where I did a quick-and-dirty hack to get around the limitations of ASP.NET’s built-in isMobileDevice property.

At the end of that post, I said I was going to wait and see if Microsoft did a better job next time around before I went to the trouble of improving my solution. Well, it didn’t work out that way. You see, even if I hadn’t disliked leaving a quick-and-dirty fix in place, it turned out that there was another complication that meant I really needed to provide a proper solution.

The app uses Ajax extensively (and explicitly) in the non-mobile version in order to give a better user experience. It also uses Ajax implicitly in the mobile solution, as jQuery mobile automatically converts links and forms into Ajax calls unless you tell it not to do so. What I hadn’t taken into account in my quick-and-dirty approach was that I wasn’t just detecting mobile devices inside the view engine – I also needed to detect them in order to provide partial pages to Ajax calls in the non-mobile Web version.

The app delivers three kinds of content:

  • Full Web Pages
  • Full Mobile Pages
  • Partial pages for non-mobile Ajax calls

Unfortunately, as jQuery mobile also makes Ajax calls, when mobiles were not detected by the built-in isMobileDevice property, I was returning the partial page when I should have been returning the full mobile page.

So back to the drawing board.

And since I was now going to have to do things properly, I decided to support all the major mobile platforms, not just Android.

I created a new static method isMobileDevice() which accepts an argument of type HttpContextBase and checks both the built-in isMobileDevice property and series of string constants. I then call this method from inside the ViewEngine Nuget and also from my controllers when detecting if the call is an Ajax call.

Here is the key method:

Sample code from method detecting mobile devices

And here is one of the calls to the method:

Sample code calling the new method

If you want the full code, I’ve placed it online as devicedetector.txt. I hope you find it useful.

Kevin Rattan

For other related information, check out these courses from Learning Tree:

Building Web Applications with ASP.NET MVC

Building Web Applications with ASP.NET and Ajax


Learning Tree International

.NET & Visual Studio Courses

Learning Tree offers over 210 IT training and Management courses, including a full curriculum of .NET training courses.

Free White Papers

Questions on current IT or Management topics? Access our Complete Online Resource Library of over 65 White Papers, Articles and Podcasts

Enter your email address to subscribe to this blog and receive notifications of new posts by e-mail.

Join 29 other subscribers
Follow Learning Tree on Twitter

Archives

Do you need a customized .NET training solution delivered at your facility?

Last year Learning Tree held nearly 2,500 on-site training events worldwide. To find out more about hosting one at your location, click here for a free consultation.
Live, online training